
How to Create Custom Payment Links for Your Business

In today's digital age, streamlining your payment process is crucial for business success. One powerful tool at your disposal is the custom payment link. These versatile links can revolutionize how you collect payments, making transactions smoother for both you and your customers.
Custom payment links are unique URLs that lead directly to a secure payment page for your business. They offer a flexible, professional way to request and receive payments, whether you're selling products, services, or collecting donations. By implementing custom payment links, you can:
1. Simplify the checkout process for your customers
2. Reduce cart abandonment rates
3. Easily share payment options across various platforms
4. Track and analyze payment data more effectively
5. Present a more professional image for your brand
In this guide, we'll walk you through the process of creating and implementing custom payment links for your business. From choosing the right payment gateway to optimizing your links for maximum conversion, you'll learn everything you need to know to take your payment system to the next level.
Let's dive in and explore how custom payment links can transform your business transactions and boost your bottom line.
Choose a Payment Gateway
Selecting the right payment gateway is a crucial step in creating custom payment links for your business. A payment gateway is a service that processes credit card payments for online and in-person transactions. Here are some popular options and factors to consider when making your choice:
Popular Payment Gateway Options
- Stripe
- Known for its developer-friendly API and extensive customization options
- Supports a wide range of payment methods and currencies
- Offers competitive pricing with no monthly fees
- PayPal
- Widely recognized and trusted by consumers worldwide
- Provides both PayPal account and guest checkout options
- Offers PayPal Working Capital for eligible businesses
- Square
- Ideal for businesses that have both online and in-person sales
- Provides a suite of business tools beyond payment processing
- Offers flat-rate pricing and no long-term contracts
- One of the oldest and most established payment gateways
- Provides advanced fraud detection tools
- Offers a virtual point-of-sale system for phone and mail orders
Factors to Consider When Selecting a Payment Gateway
When choosing a payment gateway, it's important to consider the following factors:
1. Fees: Be sure to understand the fee structure including setup fees, transaction fees, and any additional costs.
2. Payment methods: Ensure that the payment gateway supports the payment methods that your customers are likely to use.
3. Security: Consider the security features offered by the payment gateway to protect sensitive customer information.
4. Integration: Check whether the payment gateway can be easily integrated with your existing website or e-commerce platform.
5. Customer support: Look for a payment gateway provider that offers reliable customer support to assist with any issues or questions.
6. Reputation: Research the reputation and reliability of the payment gateway provider to ensure smooth and consistent payment processing.
Considering these factors will help you choose a payment gateway that best fits the needs of your business and customers.
How to Create Custom Payment Links for Your Business
Set Up Your Payment Gateway Account
Once you've chosen the payment gateway that best fits your business needs, the next step is to set up your account. While the exact process may vary depending on the provider, here's a general guide to help you through the account creation and verification steps:
Account Creation Process
- Visit the Provider's Website
- Go to the official website of your chosen payment gateway provider.
- Look for a "Sign Up" or "Create Account" button, typically located in the top right corner or main navigation menu.
- Choose Your Account Type
- Select the appropriate account type for your business (e.g., individual, business, or enterprise).
- Some providers may ask about your business type or expected monthly transaction volume to recommend the best account type.
- Provide Basic Information
- Enter your personal details (name, email, phone number).
- Input your business information (business name, address, website).
- Create a strong password for your account.
- Accept Terms and Conditions
- Review the provider's terms of service and privacy policy.
- Check the box to indicate your agreement with these terms.
- Verify Your Email
- Check your inbox for a verification email from the provider.
- Click the verification link to confirm your email address.
Verification Steps
After creating your account, you'll need to complete several verification steps to ensure the security of your account and comply with financial regulations:
- Business Verification
- Provide your business's legal name and structure (e.g., sole proprietorship, LLC, corporation).
- Submit your Employer Identification Number (EIN) or Social Security Number (SSN) for tax purposes.
- Upload any required business documentation (e.g., business license, articles of incorporation).
- Identity Verification
- Submit a copy of a government-issued ID (e.g., driver's license, passport) for the business owner or authorized representative.
- Some providers may use an online identity verification system that requires you to take a selfie or answer security questions.
- Bank Account Linking
- Provide your business bank account details for receiving payments.
- Verify your bank account through micro-deposits or instant verification, depending on the provider's process.
- Set Up Two-Factor Authentication (2FA)
- Enable 2FA for added security, typically using an authenticator app or SMS.
- Complete Any Industry-Specific Requirements
- Depending on your business type, you may need to provide additional information or documentation (e.g., for high-risk industries).
- Wait for Approval
- The provider will review your submitted information and documents.
- This process can take anywhere from a few hours to several business days.
- You may be contacted if additional information is required.
- Set Up Your Dashboard
- Once approved, log in to your account and familiarize yourself with the dashboard.
- Configure your account settings, such as payout schedules and notification preferences.
By carefully following these steps, you'll successfully set up your payment gateway account, paving the way for creating custom payment links for your business. Remember, a thorough and accurate setup process will help ensure smooth operations and minimize potential issues down the line.
How to Create Custom Payment Links for Your Business
Create Your Custom Payment Link
Now that your payment gateway account is set up and verified, it's time to create your custom payment link. This process may vary slightly depending on your chosen payment gateway, but the general steps and customization options are often similar. Here's a step-by-step guide to help you create your custom payment link:
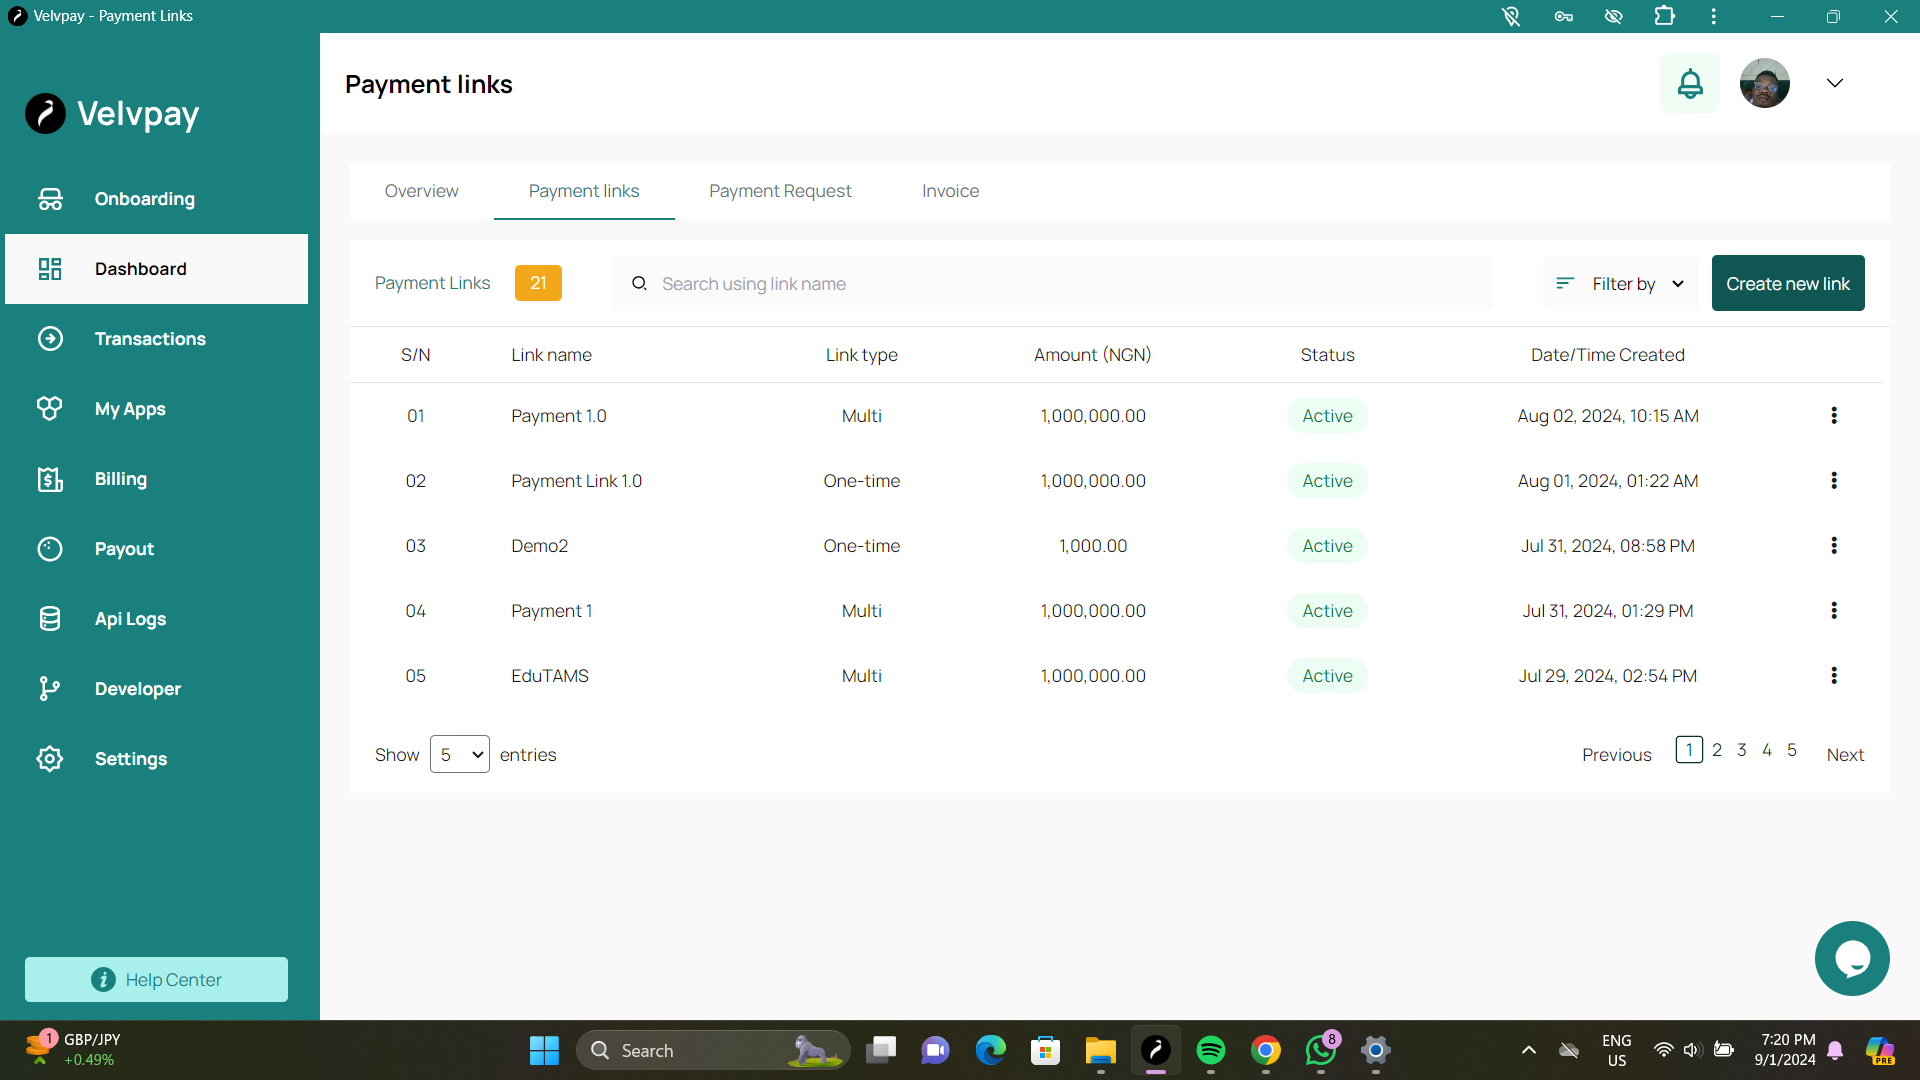
Step-by-Step Guide
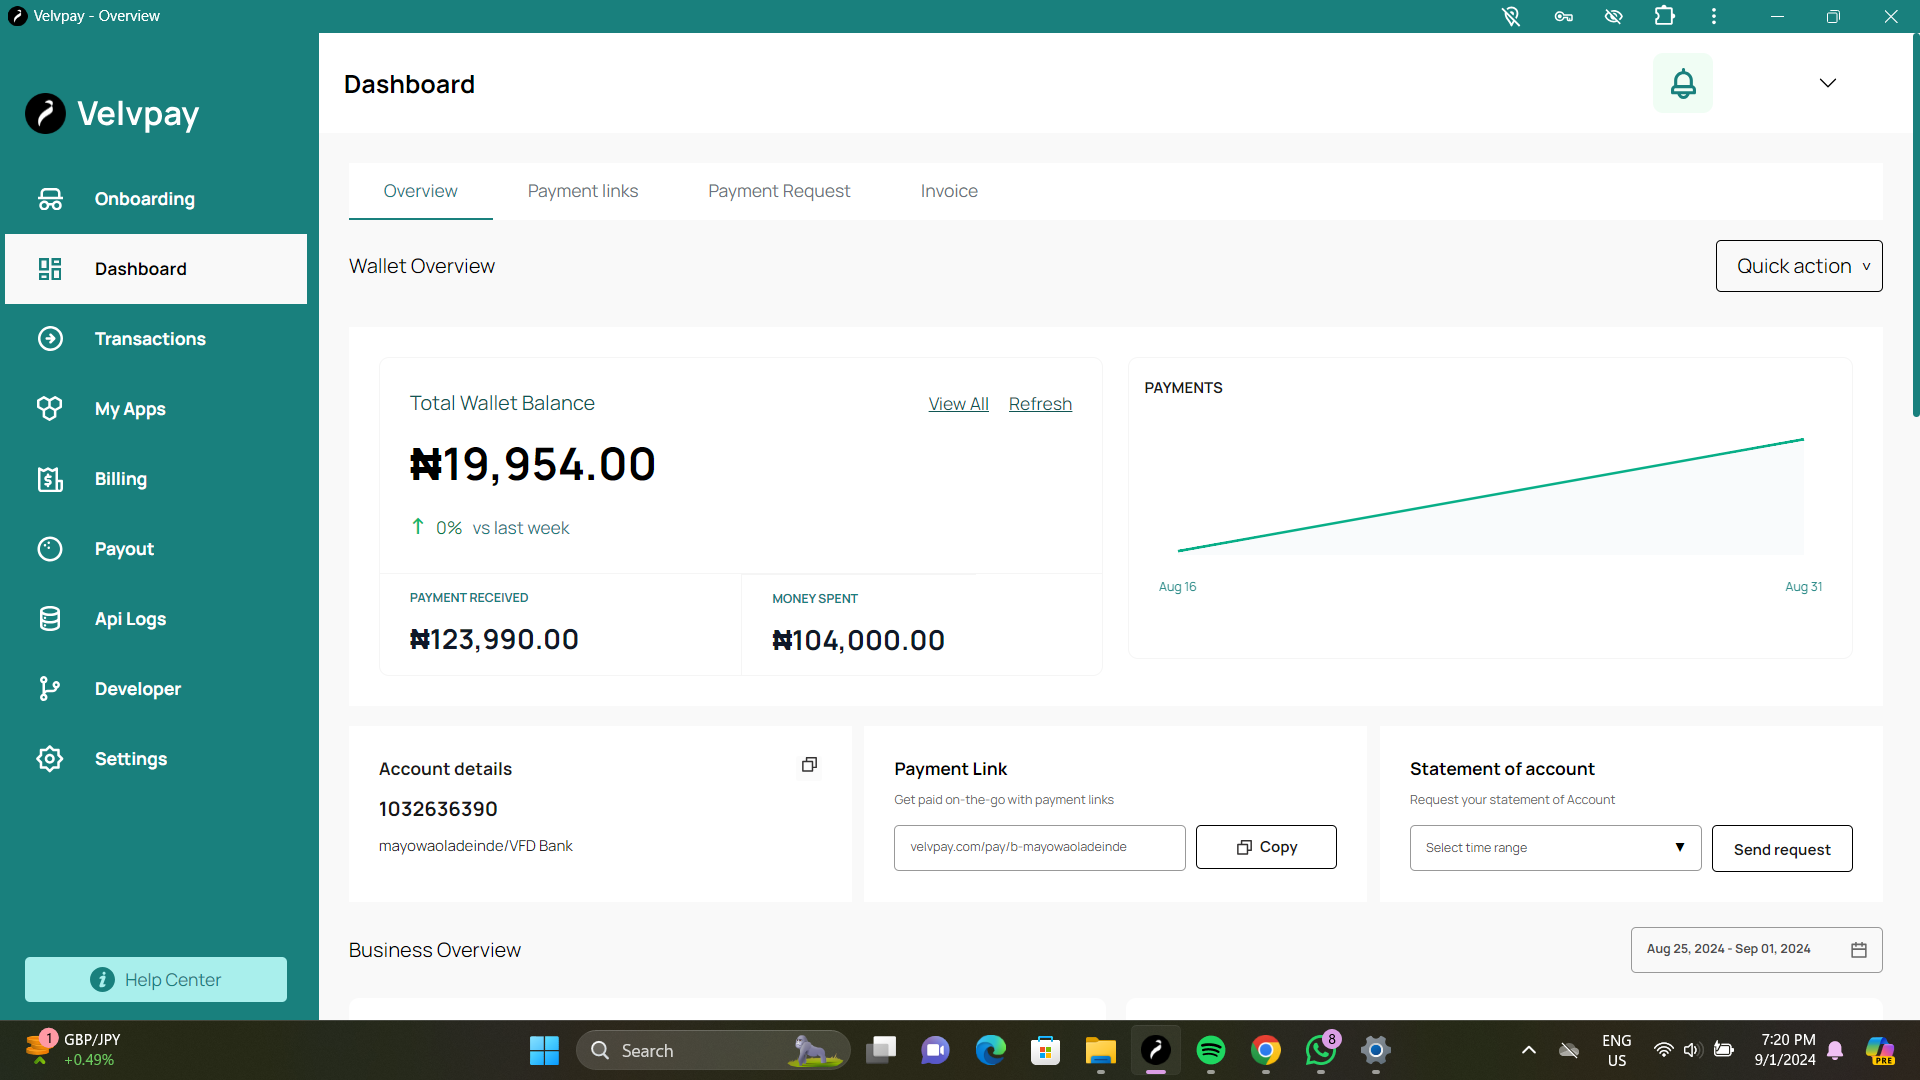
- Log into Your Payment Gateway Dashboard
- Access your account through the provider's website or app.
- Navigate to the Payment Links Section
- Look for options like "Payment Links," "Create Link," or "Generate Payment URL."
- This may be under a broader category such as "Products" or "Payment Methods."
- Choose the Type of Payment Link
- Select whether you want a one-time payment link or a reusable link.
- Some providers offer options for subscription payments or donation links.
- Set the Payment Amount
- Enter a fixed amount for the payment.
- Alternatively, choose a variable amount option if you want the customer to enter the payment amount.
- Add Item Description
- Provide a clear, concise description of what the payment is for.
- This will appear on the payment page and in transaction records.
- Configure Currency and Language
- Select the currency you want to receive payment in.
- Choose the language for the payment page if your provider offers multiple language options.
- Set Expiration Date (Optional)
- Decide if you want the link to expire after a certain date or remain active indefinitely.
- Add Customer Information Fields
- Choose what information you want to collect from the customer (e.g., name, email, address).
- Configure Success and Cancel URLs
- Set up the pages customers will be directed to after a successful payment or if they cancel the transaction.
- Review and Create
- Double-check all the settings you've configured.
- Click "Create," "Generate," or a similar button to create your payment link.
Customization Options
Most payment gateways offer various customization options to tailor your payment link to your business needs:
- Branding
- Add your company logo to the payment page.
- Customize colors to match your brand identity.
- Product Images
- Include images of the product or service being sold.
- Multiple Items
- Create a payment link for multiple items or services at once.
- Discounts and Promotions
- Add coupon codes or time-limited discounts to your payment link.
- Recurring Payments
- Set up subscription or installment payment options.
- Tax and Shipping
- Configure tax rates and shipping costs if applicable.
- Custom Fields
- Add specific fields to collect additional information from customers.
- Payment Methods
- Choose which payment methods to accept (e.g., credit cards, digital wallets).
- Inventory Management
- Set a limit on the number of times a link can be used.
- Analytics Integration
- Connect your payment link to analytics tools for tracking performance.
Remember, the specific customization options available may vary depending on your chosen payment gateway and account type. Explore your dashboard thoroughly to discover all the features available to you.
By following these steps and utilizing the customization options, you can create a payment link that not only facilitates transactions but also enhances your brand image and improves the customer experience.
How to Create Custom Payment Links for Your Business
Design and Branding
Creating a cohesive brand experience is crucial when using custom payment links. Here's how to incorporate your brand elements:
- Use your company logo on the payment page
- Apply your brand colors to the payment form
- Ensure consistent typography
- Create a seamless transition from your website to the payment page
- Consider the overall user experience and how it reflects your brand values
Testing Your Payment Link
Before going live, thorough testing is essential:
- Conduct test transactions using various payment methods
- Check the functionality on different devices and browsers
- Verify that confirmation emails are sent correctly
- Test error handling and edge cases
- Ensure proper recording of transactions in your system
Common issues to watch for:
- Incorrect pricing or currency
- Broken links or buttons
- Slow loading times
- Compatibility issues with certain browsers or devices
Implementing the Link in Your Business
Effective ways to use your custom payment link:
1. Website Integration:
- Add prominent "Pay Now" buttons
- Include links in product descriptions
- Create a dedicated payments page
2. Social Media Usage:
- Share links in post captions
- Use in your bio or about section
- Create social media-specific campaigns
3. Email Marketing:
- Include payment links in newsletters
- Send targeted payment requests
- Use in follow-up emails for abandoned carts
Security Considerations
Protecting payment data is paramount:
- Ensure your payment gateway is PCI DSS compliant
- Use SSL/TLS encryption for all transactions
- Implement strong authentication measures
- Regularly update and patch your systems
- Train staff on security best practices
- Monitor transactions for suspicious activity
Tracking and Analytics
Leverage data to improve your payment process:
- Set up conversion tracking
- Monitor key metrics (e.g., conversion rate, average transaction value)
- Use A/B testing to optimize your payment page
- Analyze customer behavior and preferences
- Integrate with your CRM or analytics tools for deeper insights
Conclusion
Custom payment links offer a versatile and efficient way to collect payments for your business. By following the steps outlined in this guide, you can create professional, branded payment links that streamline your transactions and improve the customer experience.
Key takeaways:
1. Choose the right payment gateway for your needs
2. Set up and verify your account properly
3. Create and customize your payment links
4. Implement strong branding and design
5. Test thoroughly before going live
6. Use your links effectively across various channels
7. Prioritize security and data protection
8. Leverage analytics to continually improve
By implementing custom payment links, you're not just simplifying transactions – you're creating a more professional, efficient, and user-friendly payment experience that can help drive your business forward.
Remember, the world of online payments is always evolving. Stay informed about new features and best practices to ensure you're always offering the best payment experience to your customers.